• 0
      1. Your cart is currently empty.
    • item(s)$0.00

Breaker Panels

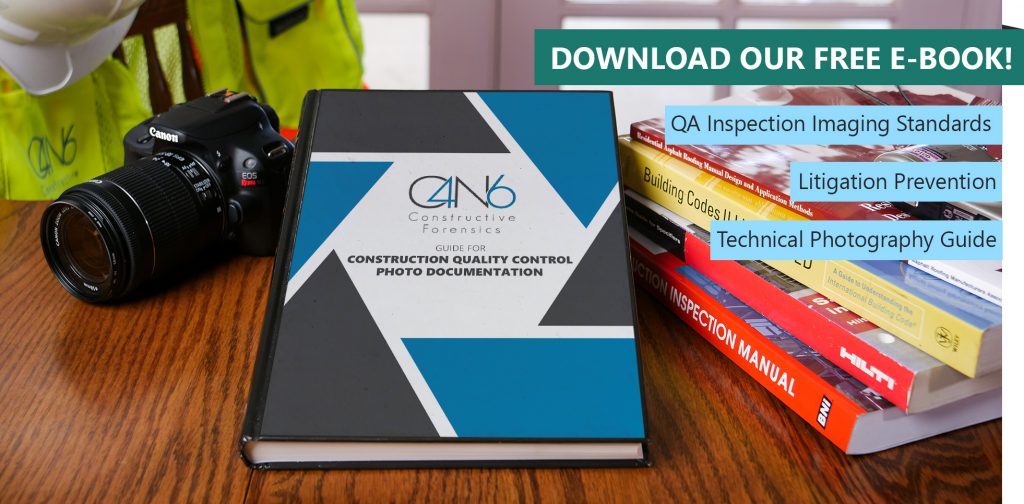
In this August edition of our HUD-REAC newsletter, I’d like to discuss breaker panels!

    • A breaker shuts off a component (like a kitchen stove or outlets) – whereas a disconnect will shut off an area or system (like a service disconnect at the meter that shuts off the entire unit or an HVAC disconnect).
    • If the breaker panel is secured (locked, screwed shut) at the time of inspection – you MUST make the panel accessible to the inspector.
      1. The fact it’s secured is NOT a defect!
      2. If you refuse to open the panel, it can be recorded as Level 3 – Blocked Access
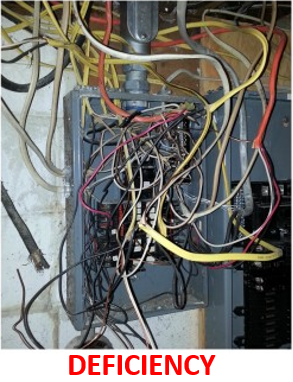
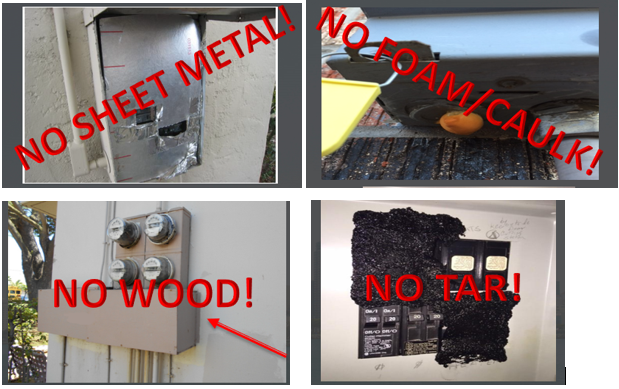
      3. Foreign materials (caulk, foam, screws) in the panel are a defect. The only acceptable materials allowed are UL rated such as blanks for breaker ports.

    • There are many defects that inspectors look for inside the breaker panels:
      1. Burnt Breakers
      2. Evidence of Leaks/Corrosion (Rust)
      3. Missing Breakers/Fuses
        • Use a blank to fill the gap or
        • A dummy breaker (not connected to anything)
      4. Missing Covers (internal cover….not the external cover) – wires have to be exposed as a result of the missing cover!
      5. Openings over ¼ inch (includes missing knockouts under or on the side of the panel)
        • ¼ inch is larger than you may think – stack 4 pennies and that is exactly ¼ inch.
        • Do NOT put the pennies in an electric panel!
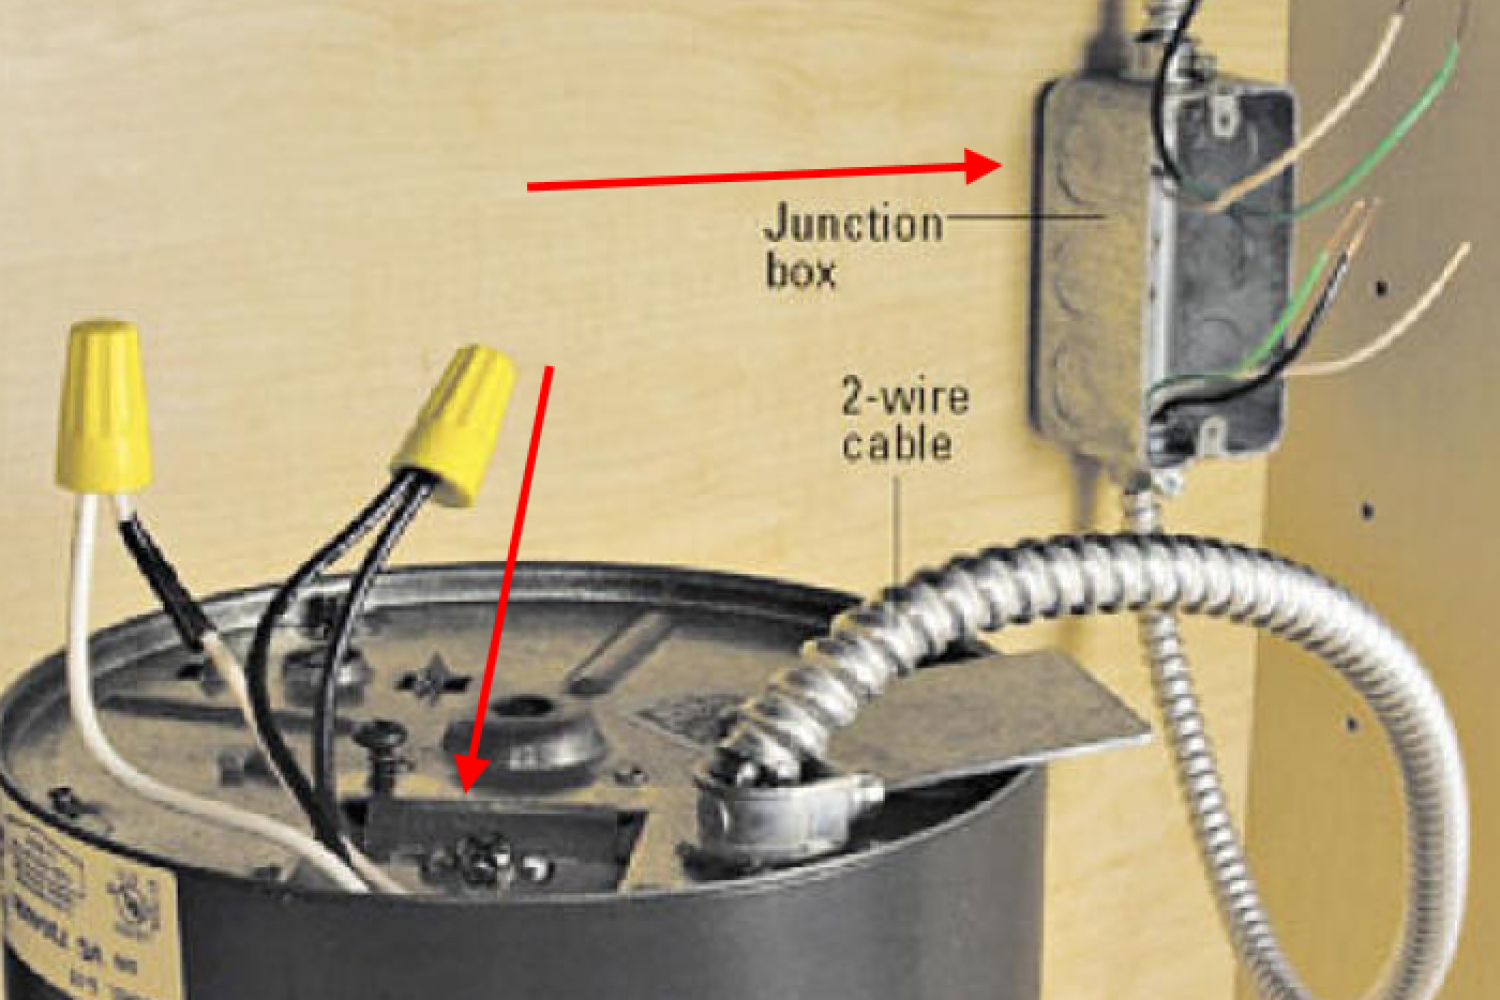
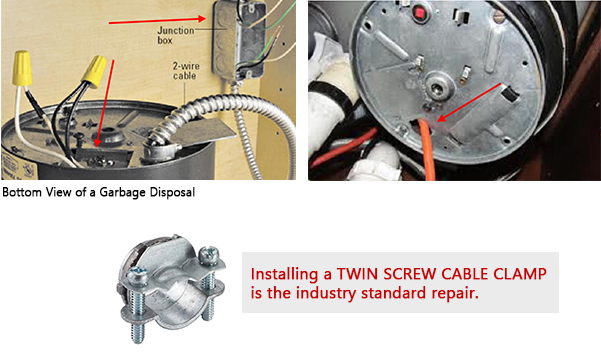
    • If your breaker panel is abandoned, all capped wires (abandoned or otherwise), bare wires, un-insulated connectors, or open terminal connections visible in an open junction box/pass-through MUST be properly enclosed in a SECURED junction box

NIS Defects

In this June edition of our HUD-REAC newsletter, I’d like to discuss NIS (Not Industry Standard) defects.

  • In 2016, HUD enacted the NIS rule: “All repairs made to address UPCS deficiencies in preparation for a REAC inspection shall be made in a good and workmanlike manner with materials that are suitable for the purpose and free from defects.”

    “Good and workmanlike manner” is defined by HUD as:

    1. Ensuring that the component, as repaired, performs its intended function/purpose
    2. Finishing the repair in a manner reasonably compatible with design and quality of the original and adjoining decorative materials.
    3. Ensure proper maintenance of each inspectable item based on industry standards

    Put succinctly, fix deficiencies the right way and don’t hide them.

  • This rule effectively wiped out all objectivity in the inspection process. HUD has, for the last 3 years, held sessions with inspectors attempting to clearly define what they perceive a NIS defect is but there is still mass confusion.
  • Because of the continued confusion amongst inspectors, on May 28, 2019, HUD delivered to inspectors the first “NIS Final Decision” PowerPoint where a Quality Assurance committee reviewed many reported NIS findings and made a ‘final decision’ of whether it truly is a NIS defect.
  • Unfortunately, there is much in this PowerPoint which contradicts the NIS definition listed above but it does provide some ammunition in appealing NIS findings and perhaps some clarity to your maintenance staff on what is considered an Industry Standard repair or not.

Comments/explanations are added to each slide of the powerpoint to help with understanding. NIS Final Decision May 2019

What You Need to Know About Garbage Disposals During a HUD REAC Inspection

In this May edition of our HUD-REAC newsletter, I’d like to discuss HUD-REAC facts that you may be unaware of regarding garbage disposals.

  1. The inspector must allow your personnel to press the reset button If the garbage disposal is tripped.
  2. If the property personnel use any tools to make repairs on the disposal, the Level 2 defect will be recorded.
  3. An Exigent Health & Safety Electrical Hazard will be recorded if the plate or knockout are missing under the garbage disposal. This has been recorded more frequently throughout the nation and can be worth up to 1.5 points per unit.

HUD Assist Services from Constructive Forensics

PRE-REAC Inspections – Work with an experienced REAC Consultant to identify deficiencies with time to make repairs and improve your HUD Score.

Training for management/personnel – Learn how to stay REAC-Ready. Gain insight into the entire process of an inspection from an experienced HUD REAC Consultant.

REAC Appeals – Our experienced REAC consultant will guide you through the REAC scoring appeal process.

Web Reporting – Unlimited access to our web reporting tool to efficiently assign work orders and to get a current view of the PRE-REAC data collected.

To learn more about HUD Assist, visit the HUD Assist Page.

14 Day and Carbon Monoxide Notices

HUD has been under increasing pressure from negative news publications, OIG (Office of Inspector General), and Congress to make serious changes to their protocol. Although there appears to be much more to come, here are their most recent published changes:

14-Day Notification of the REAC Inspection – Applicable to ALL properties that are NOT a HUD loan (so far)

  • Officially went into effect Monday, March 25, 2019 and will be enforced in the next auction (expected April 13).
  • The 14-day notification is CALENDAR days, not business days.
  • Inspection dates are no longer “negotiable.”
  • The inspector will have filled out their calendars and submitted them to HUD with 2 potential dates for your inspection.
  • 14 calendar days prior to the inspection, the inspector will attempt to call you to notify you of the inspection. You do NOT have to acknowledge this date (i.e. the inspector could just leave you a voicemail).
  • The inspector can email you the inspection date if they cannot reach you and/or is unable to leave a voicemail.
  • If you cannot or do not want to accept this date, you get a second chance within 7 calendar days of the initial notification…but you don’t get to choose the next date. The inspector has already notified HUD of your “Second Inspection Opportunity” (see 1.c)
  • You cannot change your mind and accept the initial date again because the inspector has already recorded this as your “first refusal.”
  • If you do not accept the second date, you will receive a 0 as your inspection of record and HUD wants you to know you could be referred to DEC (Departmental Enforcement Center) or have your subsidy payments withheld.
  • If your property is currently undergoing or you intend to start “major rehab,” the local HUD office will ONLY approve the postponement of the inspection if you have notified them BEFORE receiving notification of an inspection date. To qualify for “Major Rehab,” the total cost of the rehabilitation must be $15,000 per unit or more (calculated by Total Cost of Repairs ÷ Total Units = Total Cost Per Unit).
  • Do not accept any advance notification that your property is up for inspection. HUD will no longer be posting which properties are in an upcoming auction on their website. Contractors and inspectors are strictly forbidden from giving you advance notice that your property was in the auction.

Carbon Monoxide Testing by Inspectors

  • Officially goes into effect Monday, April 1, 2019. (No, this is not an April Fool’s joke!)
  • This is applicable to all properties that have fuel-fired appliance and/or an attached garage to the unit.
  • Missing or inoperable carbon monoxide detectors are NON-SCORING
  • HUD is currently in the data-collection mode. There is NO requirement to repair or remedy and damaged/missing CO detectors at this time

To view the original documents in reference, click on the links below:

PIH-2019-02 (HA) H-2019-04 – Standardization of REAC Inspection Notification Timelines

Inspector Notice No. 2019-01 – UPCS inspectors Carbon Monoxide

A Veteran’s Tips to Construction Quality Control Photo Documentation

Setting Construction Quality Control imaging standards

The images a construction quality control inspector collects is the primary line of defense against construction defect litigation. Each image collected is therefore discoverable and needs to be admissible as evidence in a court of law. If litigation standards are met in both content and clarity, we meet basic requirements for use by a defense team against construction defect claims. By contrast, if the Litigation standards are not met the image has little to no use. Below are the key things to consider when setting the standard for your construction defect litigation photography

Construction Defect Litigation Roof Inspection Photo

Proportional Image worth

No image is more important than another. We can’t predict which of the images taken will be vital in the future. The best approach is to treat every image as a valuable and necessary piece of evidence that may someday save a client from paying millions in construction defect litigation allegations.

Construction Defect Litigation Roof InspectionPhoto

Evidentiary Value

The images you take:

  • may be used in some legal setting years after it was taken. The image must speak for itself since the inspector will likely not take the stand as a construction expert witness
  • should be clear, in focus and properly exposed
  • should show the assembly in the correct condition
  • should not show incorrect assemblies or in-progress work that could be considered incorrect

Image Content

When taking photos for construction documentation as a part of a construction quality control inspection:

  • Use judgement when choosing a place to stand to capture the best image (position).
  • Carefully frame the image, making sure that the inspected item is centered and prominently featured (composition).
  • Image should not contain anything that is in an incorrect state or anything that is incomplete or in progress that could be considered incorrect.
  • Image should not contain anything that would be considered offensive to the client or the future property owner. (For example, a beer can in the wall.) These images can set the tone for the overall construction.
This image is an example of correct position, but poor composition. It is supposed to show the foam tongue in the correct condition, but the foam tongue is not visible in the frame.

With the correct position and composition, we can clearly see that the foam tongue is in the correct condition.

Image Quality

Nothing kills the quality of an image more thoroughly than being blurry. Everything else about the image can be perfect, but if blurry the image is useless. Even a little bit of blurriness can seriously limit the usefulness since the image would likely not stand up to any zoom at all. Our guide for Construction Quality Control Photo Documentation lists the common reasons for blurry images and ways to avoid them.