• 0
      1. Your cart is currently empty.
    • item(s)$0.00

August NSPIRE/REAC Newsletter: Fire Extinguisher Standard

August 2026: Fire Extinguisher Standard

NSPIRE Self-Inspection Checklists are NOW AVAILABLE for ALL programs
that have their Final Rules released (HCV, HOPWA, HOME, HTF, LIHTC)
Click here for free, downloadable REAC Resources.
New Training Dates TBD due to NSPIRE Standard Updates this Summer!

In this August Newsletter, I am still hopeful that HUD will announce SOON that they have posted the Standards in the Federal Register for public review and commentary.  Unfortunately, we’re still waiting.

This Newsletter will dispel the myths surrounding the Fire Extinguisher Standard and analyze the deficiencies.
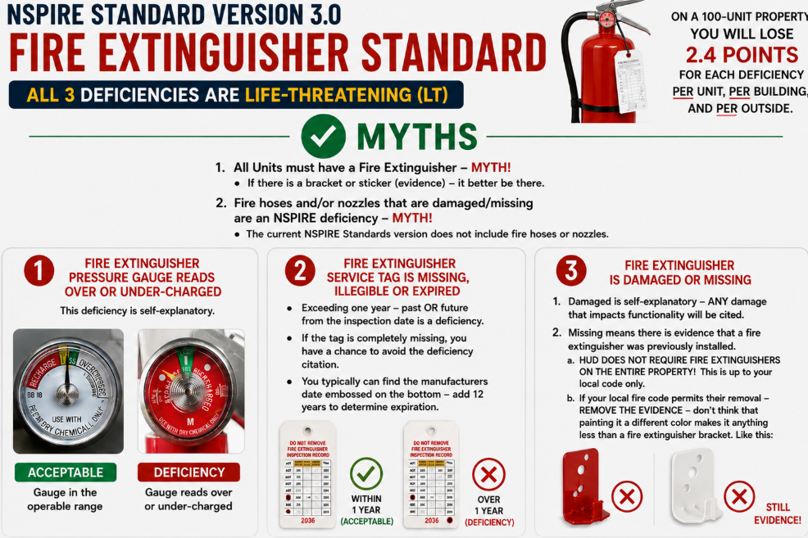
ALL 3 deficiencies under the Fire Extinguisher Standard are Life-Threatening (LT)
For properties that receive a score:  on a 100-unit property, you will lose 2.4 points for EACH deficiency PER Unit, PER Building and PER Outside.

MYTHS:

  1. All Units must have a Fire Extinguisher – MYTH!
    1. This myth began from the very first iteration of the NSPIRE Standards – Version 1.3 which was part of the Demonstration – NEVER a rule:
  1. HUD quickly corrected this in the next version, and the final version does NOT state Units are required to have them.  However, if there is a bracket or sticker (evidence) – it better be there.
  1. Fire hoses and/or nozzles that are damaged/missing are an NSPIRE deficiency – MYTH!
    1. The current NSPIRE Standards version does not include fire hoses or nozzles
  1. There is a very high probability they will be added to future Standards.  Your fire hose cabinets should NOT look like this:

EXEMPT Fire Extinguishers:

Deficiency #1: Fire Extinguisher Pressure Gauge Reads Over or Under-Charged
This deficiency is self-explanatory – no extra guidance should be needed other than the following photos:

Deficiency #2: Fire Extinguisher Service Tag is Missing, Illegible or Expired

  • The Deficiency Criteria (most important section of each Deficiency) states:
  1.  Exceeding one year – past OR future from the inspection date is a deficiency.  I once saw a tag punched for 2036 – that does NOT mean it’s good for the next 10 years haha

2. If the tag is completely missing, you have a chance to avoid the deficiency citation!

3.You typically can find the manufacturers date embossed on the bottom of fire extinguishers in 2 or 4 number combinations – just add 12 years to the number to figure out the expiration:

Deficiency #3: Fire Extinguisher if Damaged or Missing

1. Damaged is self-explanatory – ANY damage that impacts functionality will be cited.Missing means there is evidence that a fire extinguisher was previously installed.

a. HUD DOES NOT REQUIRE FIRE EXTINGUISHERS ON THE ENTIRE PROPERTY!  This is up to your local code only.
b. If your local fire code permits their removal – REMOVE THE EVIDENCE – don’t think that painting it a different color makes it anything less than a fire extinguisher bracket.  Like this:

The last point I want to make is primarily for the properties that receive a score.Since the 3 deficiencies are completely different from each other, and HUD permits citing multiple deficiencies on 1 inspectable item, you could potentially lose 7.2 deficiencies on ONE extinguisher (this score is based on a Fire Extinguisher in a Unit on a property with 100 units).


Please reach out to me for consulting, Pre/Post-NSPIRE inspections, training, appeals, or if you just have a question!

Resources
HUD has PDFs (videos are currently down) on how to appeal and how to close out H&S deficiencies here:
NSPIRE Toolkit
**Remember, if you will be appealing something that was cited,
your “defect mitigation in 24 hours” is that you are appealing…not that you fixed it!**
To subscribe to this free monthly newsletter and read newsletters you may have missed, click here: C4N6 Newsletter Registration and Archive

Erosion/Rutting

In this December edition of our HUD-REAC newsletter, and especially during the rainy season, I’d like to discuss HUD’s protocol on Erosion and Rutting and how you can comply!


HUD’s Definition of Erosion and Rutting

  • Erosion and Rutting
    • Natural processes, weathering, erosion, gravity, or man-made processes have caused either of these conditions:
      1. Collection or removal of surface material
      2. Sunken tracks, ruts, grooves, or depressions

*This does not include erosion/rutting from a defined storm drainage system or in a play area – these are covered in those inspectable areas

  • There is no Level 1 choice for Erosion/Rutting
  • Level 2 is defined as:
    1. Erosion has caused surface material to collect, leading to a degraded surface that would likely cause water to pool in a confined area, especially next to structures, paved areas, or walkways.
    2. A rut/grove is 6-8 inches wide AND 3-5 inches deep
  • Level 3 is defined as:
    1. Runoff has extensively displaced soil, which has caused visible damage or the potential failure of adjoining structures or systems, such as pipes, pavements, foundations, building, etc.
    2. Advanced erosion threatens the safety of pedestrians or makes an area of the grounds unusable
    3. There is a rut larger than 8 inches wide by 5 inches deep.
  • General Rules
    • For Erosion to be recorded, it MUST have displaced soil.
    • Bare ground is NOT erosion (such as the area under a tree or path that residents use but does not have grass growing on it)
Not Erosion!

Not Erosion!

advanced erosion

Without support, the slab will crack (L3)

erosion with damage

This is commonly caused by a sprinkler aimed at the slab (L3)

When inspectors see irrigation lines, it’s an automatic erosion deficiency. Bubblers not included (those are designed to be on top of the soil) (L2)

steep slope erosion

On a steep slope, after you install the 50/50 dirt-concrete mix, you may need a mini retaining wall to help support the slab. (L3)

  • What to do about Erosion and Rutting
    • Try to find the root cause of the erosion/rutting and fix the cause
    • Do NOT try to hide the erosion with hay, bark, loosely packed soil, etc – inspectors are permitted to move it away to see if you’re trying to hide it.
    • Many properties tell me that using a 50/50 dirt-concrete mix greatly reduces the chances of future run-off and obviously reduces the labor time of having to reapply the dirt every time it rains!
    • Do NOT drive carts/lawnmowers on the landscaping after a rain or super-soak from your sprinklers.
    • In snow country – be careful about using oversized snowplows for sidewalk snow removal. This creates huge ruts and subsequent erosion next to the sidewalk slabs.
    • Consider large river rocks or mini-retaining walls around difficult to maintain erosion areas.
    • If you do not wish to use plastic/PVC corrugated piping, concrete or plastic splash blocks under downspouts, you can use large river rocks (consider it like a French drain). This is to prevent the water from pooling next to the foundation or runoff from the foundation– you want to divert the water away from the foundation.

Blocked Egress

In this November edition of our HUD-REAC newsletter, I’d like to discuss HUD’s protocol on Blocked Egresses and how you can comply!


General Rules

  • Doors and doorways are ALWAYS considered primary egress
    • If a room has 2 doors and a window – the window can be blocked as long as both doors are accessible/egressable
  • All rooms up to the 3rd floor – if the room is designed with 2 means of egress, both must be egressable.
    • What does this really mean?
      • A closet is typically designed with only 1 egress – the door. An inspector cannot require you to install a window to meet the 2 means of egress rule
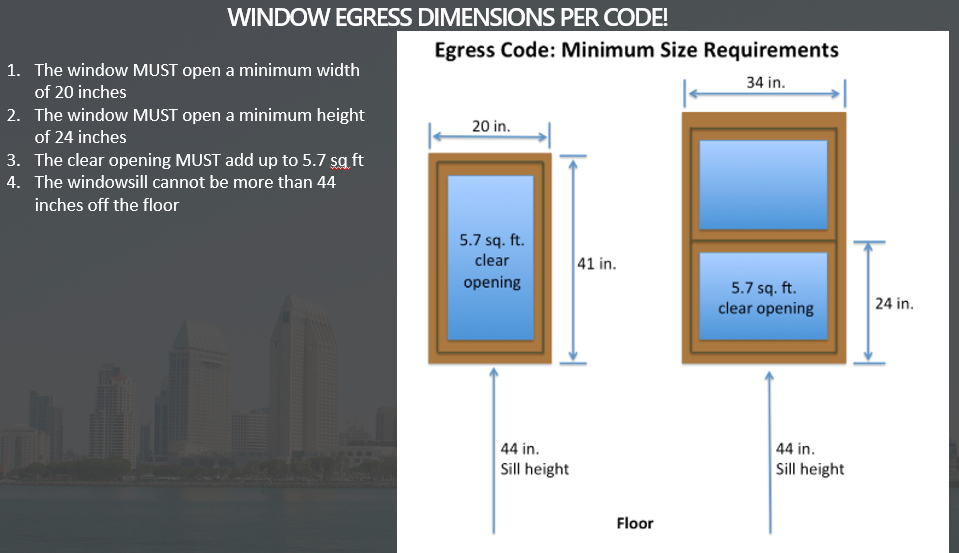
      • Some buildings have windows that are designed to open 6 inches or are leuvered, which makes them non-egressable windows – since they are not designed to be egressable, they are not required to be!
    • No items can be stored on an exterior fire escape.
    • Security Bars
      • When fixed security bars (with no quick release) are installed on the only 2nd means of egress from a room on the third floor or lower or on any floor where the window leads to a fire escape, a blocked egress will be
      • A hasp on security bars itself is NOT a deficiency, unless there is a locking mechanism (whether locked or unlocked) on the hasp or requires a tool to get the security bars open.
      • The break-away for security bars cannot be blocked by a bed or other furniture
    • Child Safety Window Guards
      • Normally found in apartments and public hallways to protect children 10 years and younger from falling to the outside.
      • Typically lightweight metal construction and can be dislodged with a reasonable degree of force when necessary.
      • Are NOT a blocked egress unless they are improperly installed or constructed.
    Approved Child Window Safety Guards

    Approved Child Window Safety Guards

  • Windows
    • Inspectors are required to “use their professional judgment” to determine if the level of effort required to open a window constitutes a deficiency for being inoperable and/or a blocked egress.
    • If the only window in a room has an Air Conditioner installed in it – whether secured or not – it is a blocked egress.
      1. Floor A/C units with the vent attached at the window with a slider kit are absolutely acceptable as long as the slider kit is installed correctly – no tape, glue, screws, etc!
      2. I have seen many successful installations using a weather strip to prevent insects and air gaps – no tape!
      3. I recommend installing a stick or thumb lock on the window if the tenant has the vent through the window for security. The inspector will remove the vent and test the primary lock but it’s good to have the window secured since the tenants typically do not remove the vent when they leave their units.
    • If the window doesn’t open or does not stay open by itself, it’s a blocked egress.
    • For Nursing Homes, Dementia, Behavioral Health Centers, etc – If the window is intentionally blocked for tenant safety AND meets State and Local Codes (is approved by the Fire Marshal) you will need to do the following:
      1. Get a letter from the Fire Marshal on his/her letterhead, signed, dated with his/her license number approving the blockage.
      2. File a Pre-Database Adjustment (Pre-DBA) with HUD and request the Pre-DBA be permanently applied for all blocked egresses AND Level 3 Window Inoperable defects.

*Inspectors will still record the L3 Inoperable Window and EH&S for Blocked Egress, but with the Pre-DBA in place – those scored items will be removed prior to report release!

  • If a tool (screwdriver, pliers, etc.) is required to open a window that is considered a 2nd egress – it’s blocked.
  • When looking at a window that has a partial obstruction due to furniture, ask yourself 2 questions:
    1. Can a bulky firefighter with all his/her gear get in quickly?
    2. Can a child/elderly person get out quickly?

Or you can go by Code:

  • Doors
    • Double-sided Keyed Deadbolts
  • Permitted to be installed:
  1. Common Area laundry rooms, shops and offices – as long as they are not in the direct path of egress for the units
  2. Unit mechanical closets
  3. Unit exterior sheds and/or exterior storage closets
  • Not permitted
  1. Any common area in the direct path of Unit egress (hallways, lobbies, stairways, etc)
  2. Any door in the unit, including the security door. Exception: The mechanical closet or exterior shed/closet (see above)
  • If ANY door in the direct path of egress requires the use of a tool (key, screwdriver, combination, etc) to open it – it’s blocked. For example, an inverted passage lock on a bathroom, bedroom, or closet door.
  • Hasp locks (other than for security bars, mechanical closets or exterior sheds/closets) are an automatic blocked egress whether the padlock is present or not.
  • Lastly, the inspector will consider the tenant population when evaluating obstructions in the path of egress. For instance, in a senior building where a unit has an excessive amount of disorganized belongings, an inspector would not expect the resident to be able to parkour their way to the door or window in the event of a fire.


Call-For-Aids

(Also known as Emergency Calls, Pull Cords, etc.)


In this October edition of our HUD-REAC newsletter, I’d like to discuss HUD’s protocol on Call-For Aids and how you can comply!


General Rules

    • If you have off-site monitoring, you can supply the inspector with a certification (within 1 year of the REAC inspection) from a local authority having jurisdiction or licensed third party that ALL of the units tested and passed inspection. The REAC inspector will then only inspect for access to the pull cord / button. Generally, the printouts provided from the agencies are not sufficient – the REAC inspectors should be satisfied with a statement certifying that the system was tested in its entirety with no defects on the company’s letterhead, signed and dated.
    • If you do not or cannot get the letter certifying the system was tested, you will need to place the system in test mode for the day and the REAC inspector will test all components:
      1. Bell/Alarm turns on
      2. On/Off site personnel are notified
      3. Light outside door turns on, etc.
    • If you have replaced your old system with a new electronic neck or hand-held type of system, ALL the old components in the units must be removed (you can replace the old call-for-aid with a blank cover plate). The following can be left in place:
      1. Light fixture over unit door
      2. Old enunciator panel in office/hall
    • Please see the attached Memo issued by HUD on 10/31/2014 regarding older emergency call systems. To the best of my knowledge, if you want to get rid of the system entirely, you will have to get the written permission from your local HUD office.
    • REAC inspectors will record a deficiency if the cord is tied up, blocked, or does not extended to “baseboard height.”
      • HUD did not intend inspectors to record the cord not being baseboard height when the baseboard is 2 inches high – but many are following the rule to the letter and they wouldn’t be wrong.
      • Do not pool the string on the floor as that is considered a tripping hazard by OSHA.
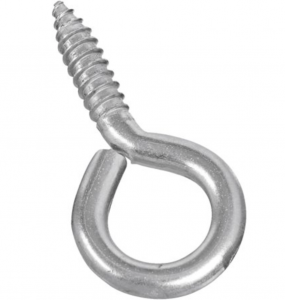
    • Many properties complain cats pull the string. Additionally, I have seen countless Call-For-Aids installed directly above the toilet paper roll! Numerous properties report 100% successful catproofing by using an eye screw!  Pull the string to a 45° angle and affix to the wall using the eye screw.  You can also place another eye screw near the baseboard to keep it relatively flush to the wall.

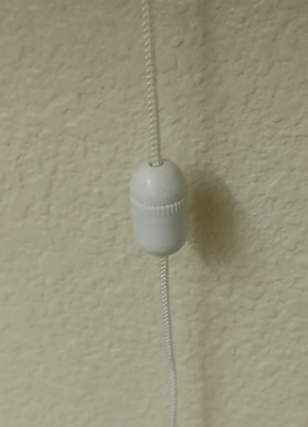
    • Many properties use condensers to easily lengthen the cord


  • Lastly, consider adding an addendum to your lease for the tenant (or family) to sign that “I will not block nor tie up my emergency pull cord.” California is the land of lawsuits…